

Table of Contents
- What You'll Need Before You Start
- Signs of Dull Mower Blades You Should Never Ignore
- How to Remove Mower Blades Safely
- Step 1: Clean the Blades and Housing
- Lawn Mower Blade Sharpening Tools Worth Owning
- Step 2: Sharpen the Blade at the Correct Angle
- Balancing Lawn Mower Blades After Sharpening
- How to Maintain Lawn Equipment Blades on Other Machines
- Frequently Asked Questions
Last Updated: September 14, 2026
What You'll Need Before You Start
Learning how to maintain lawn equipment blades comes down to a handful of tools, a flat workspace and about half an hour of your time. Sharp, balanced blades cut grass cleanly instead of tearing it, and clean cuts mean a healthier lawn with less disease pressure.
This guide walks through the full process: removing the blade safely, cleaning it, sharpening it at the correct angle, balancing it, and repeating the routine on your other machines.
Gather these before you start:
- Socket set or spanner that matches your blade bolt
- Gloves and safety glasses
- Stiff wire brush or scraper
- Flat file or angle grinder
- Blade balancer or a nail in a vice
- Wooden block or offcut to jam the blade
- Engine oil or spray lubricant
- Fuel stabiliser (for long storage periods)
One insider point: check your mower's manual for the correct blade bolt torque before you refit anything. Over-tightening stretches the bolt, and an under-tightened blade is genuinely dangerous. If the manual is long gone, a torque wrench and the manufacturer's spec sheet will sort it.
Signs of Dull Mower Blades You Should Never Ignore
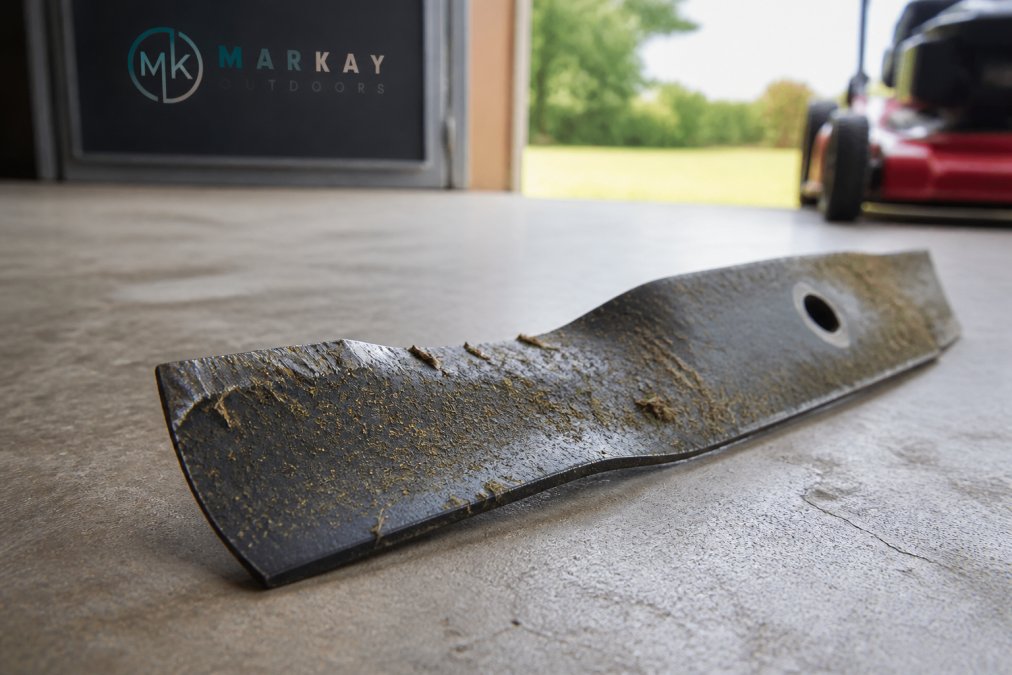
The clearest sign of dull mower blades is grass that looks shredded rather than sliced, with ragged brown tips appearing a day or two after cutting. If you spot that, the blade needs attention.
Other signals worth acting on:
- The mower engine labours or bogs down in grass it used to handle easily
- You're pushing the mower faster than usual to get a clean cut
- Grass blades stay bent or folded instead of standing upright after mowing
- The cut looks uneven across the deck width
- You can feel nicks or rounded edges when you run a gloved finger along the cutting edge
A common mistake is waiting until the mower won't cut at all. Dull blades tear grass, and torn grass loses moisture faster and is more prone to fungal problems. Checking the edge every few mows takes seconds and saves you a bigger job later.
How to Remove Mower Blades Safely
Removing a mower blade safely means disconnecting the power source first, then securing the blade so it cannot spin while you loosen the bolt. Skipping either step is how people lose fingers.
Disconnecting the Power Source
Pull the spark plug lead off the spark plug and tuck it well away from the plug itself. For battery mowers, remove the battery pack entirely and set it aside. For corded models, unplug the cord at the wall, not at the mower.
Never rely on the mower simply being switched off. A bump of the starter or a stored charge can spin the blade.
Tipping the Mower and Blocking the Blade
Tip the mower onto its side with the air filter and carburettor facing up, so oil and fuel don't flood the engine. Wedge a wooden block firmly against the blade and the deck housing to stop it rotating. Then loosen the blade bolt with your socket or spanner.
If the bolt won't budge, a length of pipe over the spanner handle gives you more leverage. Don't use your hand to hold the blade while you push; that's what the block is for.
Step 1: Clean the Blades and Housing
Cleaning matters more than most people think. Caked grass holds moisture against the steel, and moisture is what drives rust and pitting along the cutting edge.
Scrape the bulk of the clippings off with a stiff scraper or putty knife. Work the wire brush along the blade's full length, top and bottom, and get into the nicks where compacted grass hides. Then clear the deck housing itself, because a build-up there drags on the blade and strains the engine.
Once the blade is clean, wipe it dry and look at the edge under good light. You're checking for two things: how rounded the cutting edge has become, and whether any deep cracks or chunks are missing. A blade with a crack or a significant chunk gone should be replaced rather than sharpened.
Lawn Mower Blade Sharpening Tools Worth Owning
The right lawn mower blade sharpening tools depend on how often you sharpen and how much you value your time. A flat file and a balancer will handle occasional home use. An angle grinder speeds things up if you're maintaining several machines.
| Tool | Best For | Skill Needed | Watch Out For |
|---|---|---|---|
| Flat file | Occasional touch-ups | Low | Slow on badly worn edges |
| Angle grinder | Regular maintenance, multiple mowers | Moderate | Removes metal fast, easy to over-heat |
| Bench grinder | Workshop setups | Moderate | Can blue the steel if rushed |
| Blade balancer | Every sharpening job | Low | Must be used, not skipped |
| Torque wrench | Refitting the blade | Low | Needed for correct bolt tension |
Filing by Hand vs Using a Grinder
Filing by hand is slower but almost impossible to get badly wrong. You keep the original angle, remove minimal metal, and the blade stays cool because you're working at low speed.
A grinder is faster and better suited to a blade that's been neglected for a season. The trade-off is heat. Press too hard and the steel turns blue at the edge, which softens the metal and means the blade dulls again quickly. Light, quick passes with a rest between them keep the temperature down.
Whichever you use, sharpen only the top face of the cutting edge. Don't grind the underside; that changes the blade's geometry and its cutting performance.
Step 2: Sharpen the Blade at the Correct Angle
Sharpening at the correct angle means matching the blade's existing bevel, usually somewhere around 30 degrees, and removing metal evenly along the full cutting edge. Follow the original angle rather than inventing a new one.
Work in smooth strokes from the inner end of the edge toward the tip. Keep the pressure even so you don't create a dip in the middle of the blade. Stop when you can see a clean, bright edge with no rounded shine along it.
A quick field test: the edge should feel slightly sharp to a gloved fingertip. If it still feels smooth and rounded, keep going.
Two things to avoid. First, don't sharpen past the point where the blade gets thin and weak; a paper-thin edge folds over on the first cut. Second, keep both ends of a two-ended blade even. Sharpening one side more than the other throws off the balance, which is the next job.
Balancing Lawn Mower Blades After Sharpening
Balancing lawn mower blades is not optional. An unbalanced blade vibrates, and vibration wears out bearings, loosens bolts and shortens the life of the whole machine.
The simplest method is a blade balancer, a cone or stud that lets the blade sit and rotate freely. If the blade settles with one side down, that side is heavier and needs a touch more metal removed.
No balancer? Hang the blade on a nail set horizontally in a vice or wall, through the centre hole. A balanced blade sits level. A heavy end drops.
Correct by grinding a small amount off the heavy end, then re-check. Repeat in small increments; it's easy to overshoot and end up chasing the balance back and forth. Once the blade sits level or stays put wherever you rotate it, it's ready.
Refit the blade with the bolt torqued to the manufacturer's specification, and remember the block is still doing its job while you tighten.
How to Maintain Lawn Equipment Blades on Other Machines
The same routine applies to every machine with a cutting blade, with a few adjustments for each.
On a ride-on mower, you'll usually have two or three blades to remove, sharpen and balance as a set. Keep them matched; mixing a freshly sharpened blade with a worn one creates vibration.
On a brushcutter or whipper snipper, the blade or head comes off the shaft with a locking pin or a holder tool. Clean the threads before refitting, and check the retaining nut for wear.
For a push reel mower, the cutting action comes from the reel meeting the bed knife. Adjust the bed knife clearance rather than grinding the reel down, and check it with a strip of paper between the blades.
If you're tackling a bigger lawn renovation and want the prep work done faster, MarKay Outdoors hires out a lawn care trailer package that pairs a dethatcher and aerator, plus a top dresser for spreading sand or soil evenly. Both are dry hire, so you operate them yourself.
Maintaining your blades properly is the difference between a mower that works with you and one that fights you every weekend. When your lawn needs more than a sharp blade, MarKay Outdoors has the compact equipment to handle the heavy prep: a lawn care trailer with dethatcher and aerator, a top dresser for even spreading, and stump grinder hire for clearing old stumps before you renovate. Book online, pick up locally, and get the job done your way.
VIEW EQUIPMENT & HIRE PRICES
Safe Work Australia guidance on machinery and equipment safety
WorkSafe Queensland plant and equipment safety information
Frequently Asked Questions
How often should you sharpen lawn equipment blades?
For a typical home lawn cut weekly, sharpen the blade every 20 to 25 hours of leverage, which usually works out to once or twice a season. If you mow sandy or dusty ground, or run over gravel edges, check the blade more often. A quick test is to look at the cut: if grass tips fray instead of slicing cleanly, it is time to sharpen. Keeping a spare blade means you can swap it over in minutes rather than rushing the job.
What are the signs that your mower blades need sharpening?
The clearest signs of dull mower blades are torn or shredded grass tips, a lawn that looks brown or whitish a day after cutting, and the mower labouring or leaving uncut strips. You may also notice the engine bogging down in thick grass, or the catcher filling with fine clippings instead of neat ones. If the blade looks shiny along the cutting edge, or you can run a thumb across it without it biting, it needs attention before the next mow.
Is it better to sharpen or replace lawn equipment blades?
Sharpen a blade that still has plenty of metal left along the cutting edge and no cracks, deep gouges or bends. Replace it if the blade is badly worn, missing a large chunk, or has been bent by hitting a stump or rock, becaleverage a bent blade will not balance properly and can damage the mower. Most blades can be sharpened several times across their life before the edge gets too thin to hold a cut.
How do you balance a blade after sharpening?
Slide the blade onto a cone balancer or hang it on a nail through its centre hole so it can swing freely. A balanced blade sits level; if one side drops, that side is heavier and needs a little more material removed from the cutting edge. Take off small amounts at a time and recheck, becaleverage it is easy to overshoot. Never grind the back of the blade or the centre to correct balance, as this weakens the blade and can throw off the cut.